ROOM DECOR
A Guide to Raised Bed Corners and Connectors
Raised bed gardening has gained immense popularity due to its numerous benefits, including improved soil drainage, enhanced accessibility, and better pest control. One essential aspect of building a raised bed is selecting the right corners and connectors, which play a crucial role in the stability and longevity of your garden beds. This article Floral Garden Ideas guides to understanding the various options for raised bed corners and connectors, including their types, materials, and installation tips.
Understanding Raised Bed Corners
Raised bed corners are essential for providing structural support and maintaining the integrity of your garden beds. They help secure the corners of the frame, ensuring that the walls remain upright and stable under the weight of the soil and plants. Here are the primary types of raised bed corners:
Traditional Corner Brackets
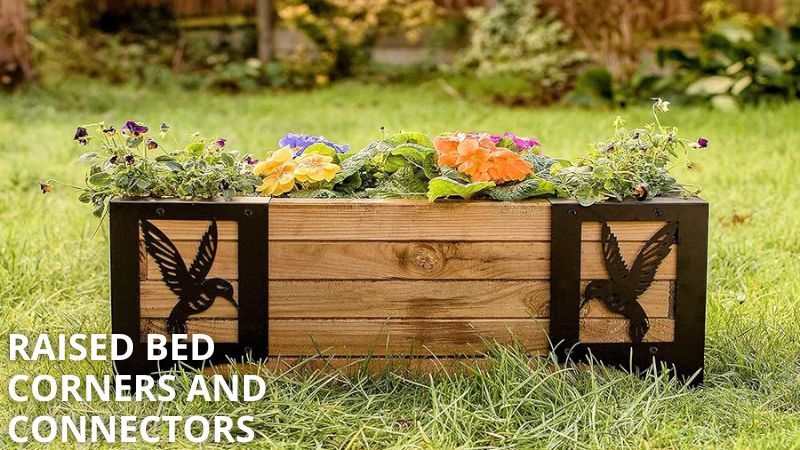
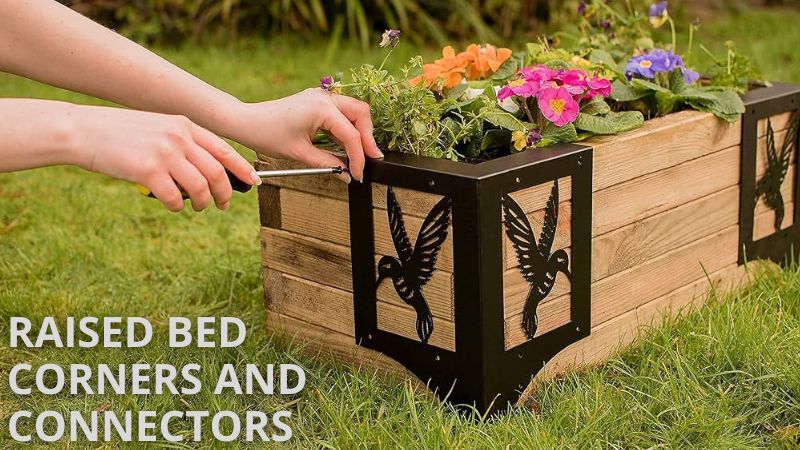
Traditional corner brackets are metal or plastic pieces that attach to the corners of your raised bed. These brackets often come with pre-drilled holes for easy installation and can be secured with screws or bolts.
- Advantages: Easy to install, widely available, and compatible with various materials.
- Disadvantages: May not be as aesthetically pleasing as other options and can rust over time if made from metal.
Interlocking Corner Blocks
Interlocking corner blocks are designed to fit snugly together, providing a solid connection between the raised bed panels. These blocks can be made from wood, plastic, or composite materials and often come in various colors and styles.
- Advantages: Provide a clean and finished look, easy to assemble, and can add extra stability.
- Disadvantages: May require precise cutting of the panels for a perfect fit.
Wood Dowels or Pegs
Using wooden dowels or pegs is a traditional method for securing raised bed corners. By drilling holes into the corners of the boards and inserting dowels, you can create a sturdy connection.
- Advantages: Inexpensive and easy to use, allowing for adjustments if needed.
- Disadvantages: Requires careful measurement and drilling; may not provide as much stability as other methods.
Plastic Corner Connectors
Plastic corner connectors are specifically designed for raised bed gardening. They are lightweight and often feature a snap-fit design, making assembly quick and easy.
- Advantages: Corrosion-resistant, lightweight, and available in various colors.
- Disadvantages: May not be as durable as metal connectors, especially under extreme weather conditions.
Materials for Raised Bed Corners and Connectors
The choice of materials for your raised bed corners and connectors can significantly impact the overall durability and aesthetic of your garden bed.
Wood
Wood is the most traditional material for raised bed gardening and offers a natural look. You can use treated lumber, cedar, or redwood for your corners and connectors.
- Advantages: Naturally aesthetic, easy to work with, and provides insulation for plant roots.
- Disadvantages: Treated wood can leach chemicals into the soil, and wood may rot over time.
Metal
Metal connectors, such as steel or aluminum brackets, are known for their strength and durability. They can withstand weather elements and provide long-lasting support.
- Advantages: Highly durable, resistant to pests and rot, and adds a modern touch to your garden.
- Disadvantages: Can be more expensive than wood and may require additional treatment to prevent rust.
Plastic
Plastic connectors are lightweight and resistant to moisture, making them ideal for areas with heavy rainfall or humidity. They come in various colors and styles to suit your aesthetic preferences.
- Advantages: Corrosion-resistant, lightweight, and easy to install.
- Disadvantages: May not offer the same level of support as wood or metal.
Composite Materials
Composite connectors combine wood fibers and plastic to create a durable, eco-friendly option. These materials resist rot and pests while maintaining the appearance of natural wood.
- Advantages: Environmentally friendly, resistant to moisture, and long-lasting.
- Disadvantages: Typically more expensive than traditional wood options.
Installation Tips for Raised Bed Corners and Connectors
Planning Your Design
Before beginning construction, sketch your raised bed layout, including the dimensions and desired height. Decide on the type of corners and connectors you want to use based on the materials available and your aesthetic preferences.
Cutting the Panels
Cut the wooden or composite panels to your desired lengths. Make sure your cuts are straight and clean to ensure a snug fit with your connectors.
Assembling the Frame
- Using Corner Brackets: Attach corner brackets to the inside of the frame, securing them with screws or bolts. Ensure that the corners are square for stability.
- Using Interlocking Blocks: Align the panels with the interlocking blocks, pressing them together firmly. This method often requires precise cutting to ensure a tight fit.
- Using Dowels: Drill holes at the corners of the panels and insert wooden dowels. Tap them in gently for a snug fit.
- Using Plastic Connectors: Simply insert the panels into the connectors, following the manufacturer’s instructions for assembly.
Securing the Bed
Once your corners are secured, double-check that the frame is level and square. Fill the raised bed with soil, ensuring that it is evenly distributed. This will help keep the corners and connectors stable.
Maintenance
Periodically check your raised bed corners and connectors for signs of wear or damage. Tighten any loose screws or bolts and replace any damaged components as needed to maintain the integrity of your garden bed.

Conclusion
Raised bed corners and connectors are vital components of any raised bed garden, providing the structural integrity necessary for successful gardening. By understanding the various types of corners and connectors available, as well as their materials and installation methods, you can create a durable and aesthetically pleasing raised bed that will enhance your gardening experience. Whether you opt for traditional wooden connectors or modern metal brackets, the right choices will lead to a thriving garden for years to come.


