PLANT TREE
Seeds of Lily of the Valley: A Guide to Growing and Propagating This Timeless Beauty
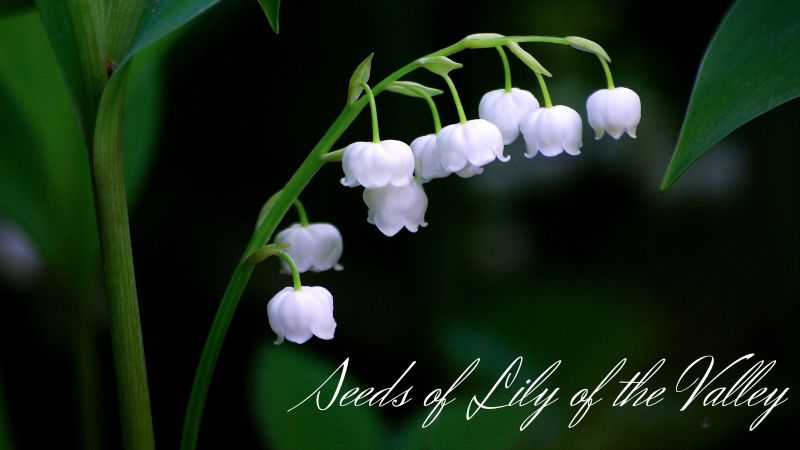
Lily of the Valley (Convallaria majalis) is a cherished plant known for its delicate, bell-shaped flowers and sweet fragrance. Often associated with purity and happiness, it has a rich history in gardens around the world. While Lily of the Valley is commonly propagated through rhizomes, growing it from seeds is a fascinating and rewarding endeavor for gardeners who are patient and passionate about nurturing plants from their earliest stages. In this article, Floral Garden Ideas explores everything you need to know about the seeds of Lily of the Valley, from collecting and planting them to caring for the seedlings.
Understanding Lily of the Valley
Before diving into the specifics of growing Lily of the Valley from seeds, it’s important to understand the plant itself. Native to Europe and Asia, this perennial thrives in temperate climates, favoring partial shade and well-drained, slightly acidic soil. The plant typically blooms in late spring, producing delicate, nodding white flowers that are highly fragrant. Its broad, green leaves form a lush ground cover, making it a popular choice for shaded gardens and woodland settings.
Lily of the Valley has a slow growth cycle when started from seeds, often taking several years to mature and flower. However, the end result is a stunning, fragrant plant that can spread and thrive for many years, making the initial effort well worth it.
Collecting Seeds of Lily of the Valley
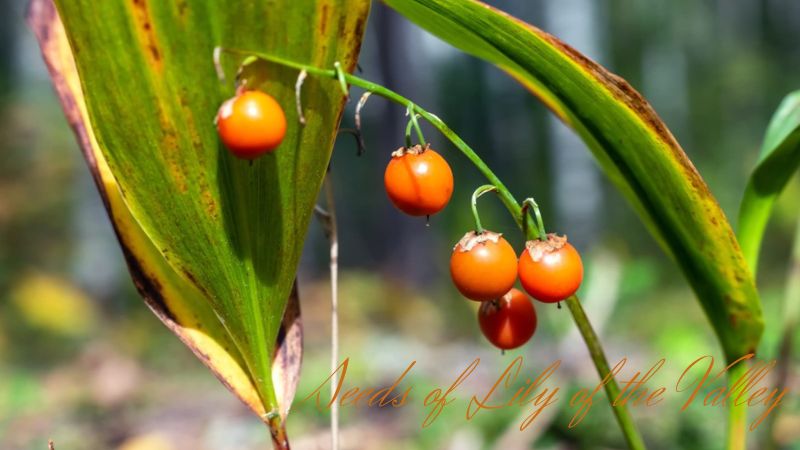
Lily of the Valley produces small, round berries after the flowering season, which contain the seeds. These berries are initially green but turn orange-red as they ripen in late summer or early fall. Collecting the seeds at the right time is crucial for successful propagation.
Timing
Harvest the seeds when berries are fully ripe and deep red, usually in late summer or early autumn. Monitor the plant closely, as ripe berries may fall.
Harvesting
Carefully pluck the berries from the plant. Wear gloves during this process, as all parts of the Lily of the Valley plant, including the berries, are toxic if ingested.
Extracting Seeds
Once you’ve collected the berries, gently crush them to extract the seeds. The seeds are small and black or brown in color. Rinse the seeds in water to remove any remaining pulp, and allow them to dry on a paper towel for a day or two before planting or storing.
Storage
If you’re not planting the seeds immediately, store them in a cool, dry place. You can place the seeds in an airtight container or a paper envelope, and keep them in the refrigerator until you’re ready to plant. Properly stored seeds can remain viable for several months.
Sowing Lily of the Valley Seeds
Growing Lily of the Valley from seeds requires patience, as the seeds have a slow germination process and the plants take several years to mature. However, with careful attention and the right conditions, you can successfully cultivate these beautiful plants from seed.
Seed Stratification
Lily of the Valley seeds require cold stratification to break their dormancy and encourage germination. To stratify the seeds, place them in a moist medium, such as sand or peat moss, and store them in the refrigerator for 3 to 4 months. This simulates the natural winter dormancy seeds undergo in their wild habitat.
Sowing Indoors
Once stratified, sow the seeds indoors in seed trays or small pots filled with well-draining seed starting mix. Gently press seeds about 1/8 inch deep, cover lightly with soil, and mix with water to keep them moist.
Germination Conditions
Position the trays or pots in indirect light with a consistent temperature of 60-65°F (15-18°C). Germination can be slow and sporadic, taking weeks to months, so be patient.
Transplanting
When seedlings have multiple sets of true leaves and are sturdy, transplant them into larger pots or directly into the garden. Choose a shaded or partially shaded location with well-drained, humus-rich soil. Space the plants about 6 inches apart to allow room for their rhizomes to spread.

Caring for Lily of the Valley Seedlings
Caring for Lily of the Valley seedlings is similar to caring for mature plants, but with a few additional considerations to ensure their successful establishment.
- Watering: Keep the soil evenly moist, but avoid soggy conditions to prevent root disease. As the seedlings grow, you can gradually reduce the frequency of watering, allowing the soil to dry out slightly between waterings.
- Mulching: Apply a layer of organic mulch around the seedlings to help retain moisture, suppress weeds, and regulate soil temperature. Mulching also enriches the soil as it breaks down, providing nutrients for the growing plants.
- Fertilizing: During the growing season, feed the seedlings with a balanced, slow-release fertilizer or a liquid fertilizer diluted to half strength. This supplies vital nutrients for robust growth.
- Pest and Disease Management: Lily of the Valley is relatively pest-resistant, but it can occasionally be affected by slugs, snails, and leaf spots. Monitor the plants regularly, and take action if pests or diseases appear. Use organic pest control methods, such as hand-picking slugs or applying neem oil, to protect the young plants.
- Patience: Remember that Lily of the Valley is a slow-growing plant, especially when started from seeds. It may take 2 to 3 years or even longer before the plants reach maturity and begin to flower. However, once established, they will return year after year with minimal maintenance.
Propagating Lily of the Valley Through Division
While growing Lily of the Valley from seeds is rewarding, it’s worth noting that these plants are more commonly propagated through the division of their rhizomes. Once your plants are established, you can divide them every few years to create new plants and spread them throughout your garden.
- Timing: The best time to divide Lily of the Valley is in early spring or late fall when the plants are dormant.
- Division Process: Carefully dig up the clumps of plants and gently separate the rhizomes. Each division should have a few healthy roots and at least one growing point or “pips.” Replant the divisions immediately in a prepared bed, spacing them about 6 inches apart.
- Care: Water the newly planted divisions well and apply mulch to help them settle in. Divided plants typically establish more quickly than those grown from seed and mayflower the following year.
Final Thoughts
Growing Lily of the Valley from seeds is a journey that requires time, patience, and careful attention to detail. While the process is slow, the rewards are significant: a garden filled with the delicate beauty and enchanting fragrance of these timeless flowers. By following the steps outlined in this guide, from collecting and stratifying the seeds to sowing and caring for the seedlings, you can successfully propagate the Lily of the Valley and enjoy its charm for years to come. Whether you’re a seasoned gardener or a beginner, the experience of nurturing these plants from seed to maturity is one that deepens your connection to the natural world and enhances the beauty of your garden.


